Showing posts with label potato. Show all posts
Thursday, January 27
Comfort food.....
What food do you turn to on a bad day? Are you a chocolate lover, or like me, a carb freak?
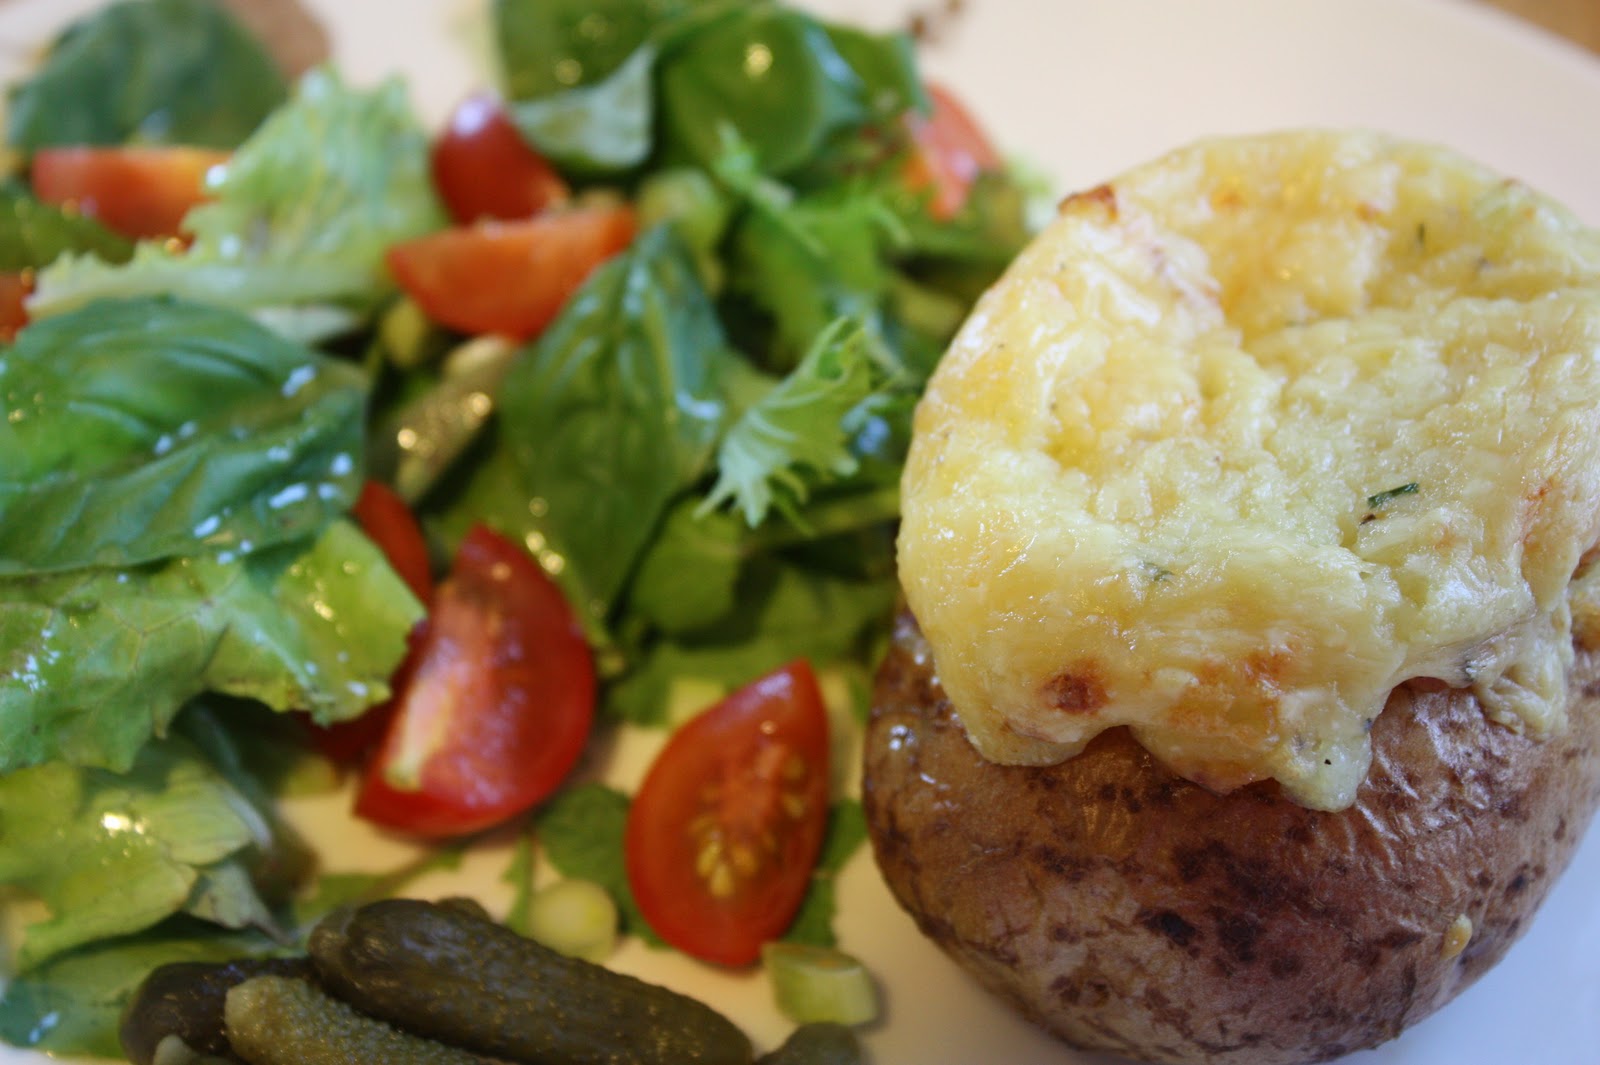
We have been having supper with Mum most nights, but it was my first day back at work today so I was back at home for dinner. I managed to avoid eye leakage for most of the day, but by the time I got home energy and motivation levels were low. The answer for me, a stuffed potato.
I can appreciate this would not be everyone's recipe of choice, but I have eaten industrial quantities of potato since birth, and I love it. This is probably a cultural choice also, growing up, just like my parents would have, we ate potato pretty much every day. A friend of mine prefers toast, preferably smothered in peanut butter, my younger sister will make Mac n Cheese in times of trouble. The other night Mum had to have two boiled eggs and toast soldiers, nothing else would do.
So I am going to share my very precise instructions for my stuffed baked potato, you might think this entirely inappropriate in the middle of summer, but times of crisis seem utterly oblivious to seasonal timetables.......
Stuffed baked potato for a grim week
First scrub your potato, I prefer Agria for a fluffy inside. To get a crispy result dry, then rub a little butter or oil over the skin, prick a few times with a fork and bake at 200C for about 60 minutes.
Meanwhile finely chop a spring onion, and place in a bowl, with a knob of butter. Grate a handful of your favorite cheese, I tend to use cheddar, with maybe a little Parmesan. Pour yourself a glass of wine and sit on the porch for a while.
When your spud is cooked take out of the oven and immediately cut away the top. This lets the steam escape, preventing the skin going soggy, and also allows you to scoop out the flesh into your onion and butter bowl.
When all the potato flesh is scooped out mash with a fork, adding a splash of milk or cream, plenty of salt and pepper, some shopped chives and the cheese. When this is nice and creamy, spoon back into the potato shell and pop back into the oven for 5 minutes or so until heated through and slightly brown on top. The top will puff up, sadly by the time I grabbed my camera it had settled down....
Eat with a salad that has a nice sharp dressing to cut through all that cheese.
You could gussy this up with crispy bacon or prosciutto, or maybe some lovely sharp blue cheese, but it really is good as is. Yes I know it is deeply uncool (even the name stuffed potato sounds so 70's) , and I promise I will do something clever with lemongrass and pomegranate next week, but I doubt a meal at Noma could have made me feel any better after a really crapola week than that spud....
A word of warning, cooked potato is one of the hottest substances known to man, after many years I can eat this without peeling a layer off the roof of my mouth, but a novice should approach with extreme caution.
Continuing my hydrangea theme, I got a lovely little bunch of flowers from a work colleague today, my favorite flower so it did make me smile. Go old fashioned flowers, we love you.
I also wanted to share a wee link for a new vintage store which has opened up in Auckland, Bread and Butter Letter, which I discovered via the very cool Extracurricular Magazine site. This is a great little mag (zine?) about crafting, even for the craft challenged like myself........
Now if you can, ring your Dad and say hi. If you cant, I'm sorry.
Wednesday, January 19
Pesto pasta with potatos...........and green beans too
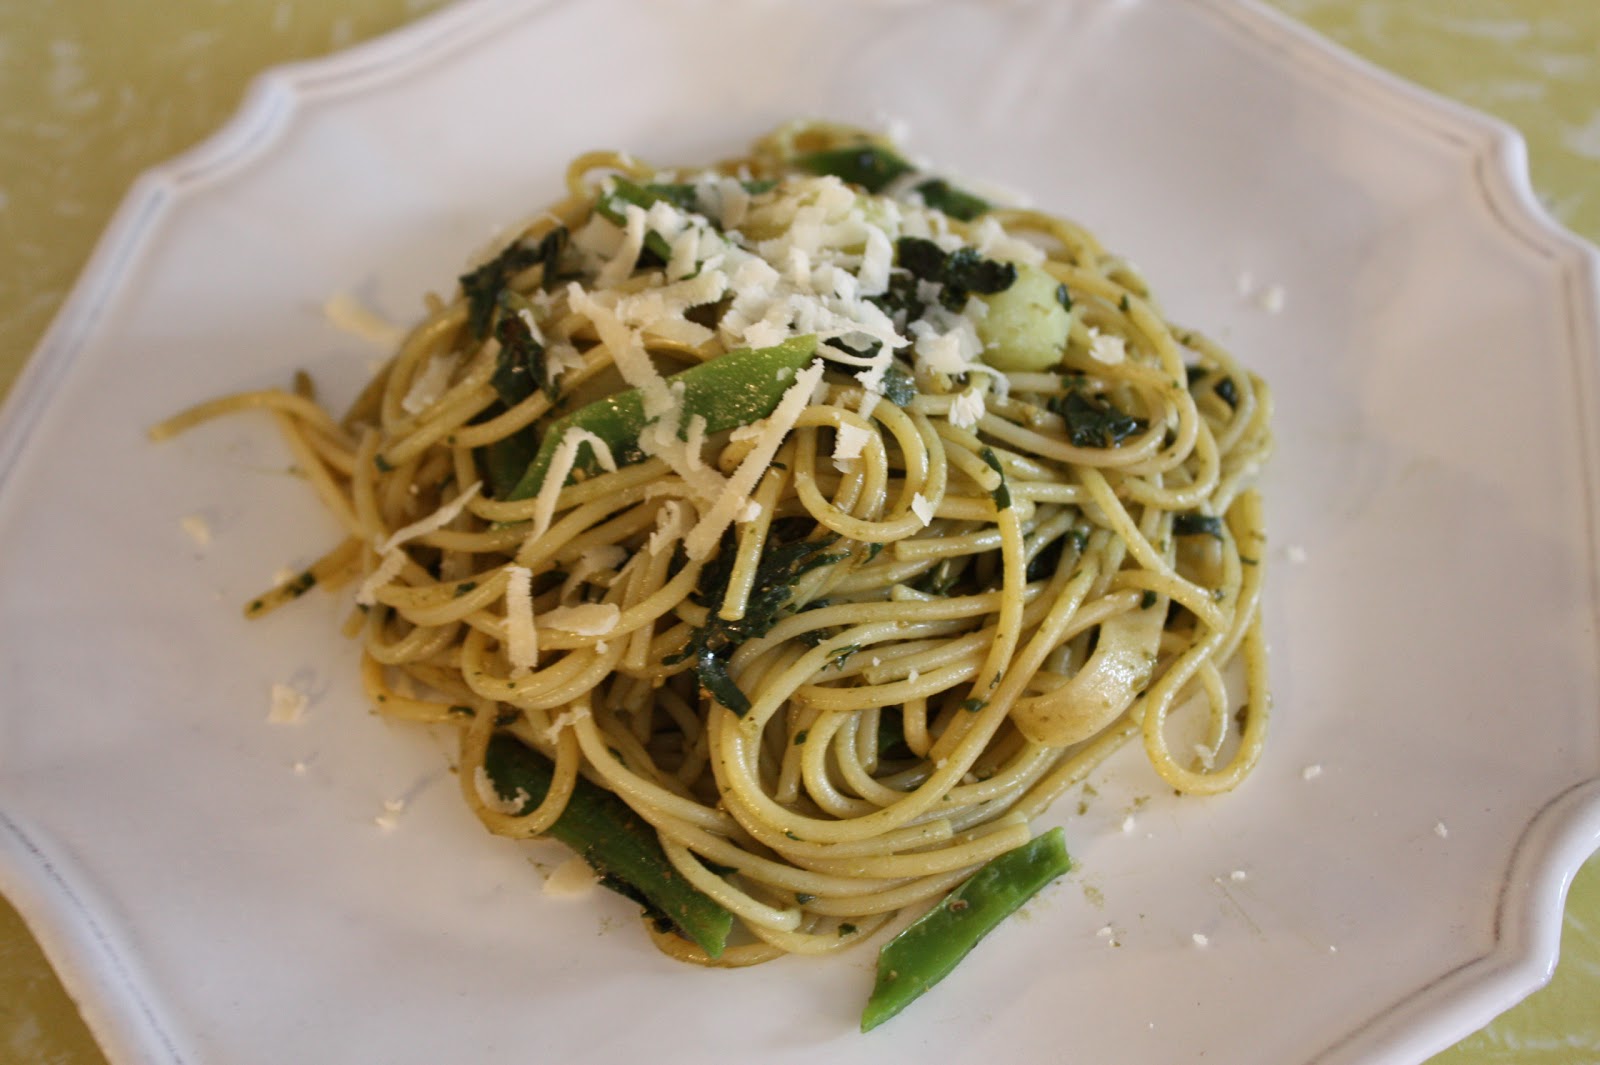
I thought after showing off a picture of my Basil plants like a proud Mama the other day it would be sensible to actually make something with them. I have pondered this dish for a while, always thinking it seemed slightly odd to combine pasta and potato in one meal. But having beans, potato, basil and pasta to hand on an evening when I was more hungry than energetic it was an obvious choice. An given how completely smitten I am with potato pizza I cant believe I thought I might not like this. Completely delish, please make again was the verdict. So I shall, and you should too....
Pesto pasta with potato and green beans
First put a large pot of water on to boil, then make your pesto. Now I know you can buy this everywhere, but seriously, you really have not got four minutes to spare? That's how long it takes, I timed it. And that is the hand version, I refuse to use a blender as I hate trying to clean them, a mortar and pestle I can just swish under the tap....
Into a mortar and pestle put a pinch of salt and half a clove of garlic. Pound the garlic a couple of times and it will disintegrate into the salt. Throw in your basil, I use two-three good handfuls for two people.
Pound away until the juices start to run from the basil's leaves and they start to turn into mush, it really only takes a couple of minutes at most. Throw in nuts, I use pinenuts or walnuts, but try what you like and see. I figure on about 40-50 grams of nuts for this amount of basil, which for me is a small handful, but more or less will not hurt.
Pound the nuts into the basil until they come together into a green thick mass, then stir in a couple of tbsp of good olive oil and a grind of pepper. Lastly add a small handful of Parmesan cheese, taste the seasoning and check the thickness, you want a slightly sloppy paste. Add more oil if necessary. Use straight away or store in a jar with a little oil on top to keep the green colour.
For the pasta you need
6-8 new potatoes, peeled and cut into chunks
A handful of green beans, sliced into chunks about the same size as your potato
150 grams spaghetti or linguine pasta
Pesto
Extra Parmesan cheese
Add plenty of salt to your boiling water, and add the potatoes. Cook for 7 minutes, then add the beans. Cook a further 5 minutes until the potato is cooked through, and the beans are cooked but not mushy. Take out of the water and set aside.
Now add your pasta to the water, and cook for about 10-12 minutes, until cooked to your liking. I like my pasta cooked slightly more than any Italian ever would, but I also put cheese with fish so am probably beyond redemption........
When the pasta is done, add the beans & potatoes back to the water to just heat up again for a couple of seconds, then drain the whole lot and add a couple of tablespoons of pesto to the pot. Stir and add some of the water the pasta was cooked in to slacken the sauce until you are happy with the consistency.
Dish up as tidily as you can onto serving plates and add a good sprinkle of Parmesan and a grind of pepper.
This sounds like a carbo loaders stodgy dream, but it is much lighter than it sounds. Fragrant with basil, you also have textural interest with the crunch of beans, creamy potato (hence the use of waxy new potatoes) and slightly chewy pasta. Have I convinced you?
A word of warning however, this is not sexy date food. You may cover yourself with sauce as I always do eating spaghetti, or worse. As Mr PK so solemnly pointed out, "the leggings and green stained t-shirt combo is already a winner, but it's that stonking bit of basil in your front tooth really does it for me......." Steady tiger......
Finally got Freedom by Jonathan Franzen from the library at lunch, my first grown up book of the year. Check out My Villa Life for a great 2011 reading list. I don't think I will aspire to quite those dizzy heights, I am so tired at the mo I fall asleep after a few pages, but it is good to have ideas for new books to read.
Monday, December 6
Winning potato salad, and a festive jam of the non traffic variety......
Ok, I must confess this potato hasn't ACTUALLY won anything, but I feel like I have thrashed tasty, lovely, delish and beautiful lately, and if it did enter X Factor who knows..........judging by what I have seen on reality TV recently anything is possible. At any rate it is really gorgeous, smokey, creamy but not to heavy for summer, yum.
Potato and salmon salad with asparagus and creamy herb dressing.
This salad was born out on a discussion (aka argument) I had with one of my sisters about the correct dressing for a potato salad (yes, we should both probably get out more....) She likes tangy vinaigrette; I like something a bit creamier. This is a mix of both. The warm potato is dressed with vinegar and a splash of oil, then cooled and mixed with a sour cream dressing, less rich than a full mayo version. The salmon gives a smokey depth of flavour, and is a great way to make hot smoked salmon, which can be expensive, go a long way without feeling in any way mean.........
1 kg waxy new potatoes (Jersey Benne are perfect for this)
Mint
A bunch of asparagus, chopped into 2cm lengths (approx)
Splash of vinegar
Splash of olive oil
Salt & pepper
A bunch of spring onions, sliced
Handful of chopped parsley
Flaked hot smoked salmon-as much or as little as you like
Dressing
2 tbsp of chives, chopped
2 tbsp dill, chopped
Handful fresh sorrel chopped (if you have it)
1 tsp capers, drained or rinsed if in salt
½ cup mayo (homemade or from a jar)
3/4 cup sour cream or cream fraiche, or yogurt if you want to lighten it up further
Squeeze of lemon juice
Begin by steaming or boiling your potatoes with a sprig of mint until tender. When the potatoes are nearly ready add the asparagus to cook for a couple of minutes until just tender (not mushy!). Drain and tip into a bowl. Splash over your vinegar and oil, about a couple of teaspoons of each. You are not drenching the vegetables, just adding a wee bit of liquid for them to soak up as they cool
While they cool, make your dressing by whisking all the ingredients together in a small bowl. If it is very thick you can thin the dressing out with water. Taste for seasoning, then fold gently through your cooled potato and asparagus with the spring onions, parsley, gherkins if using and your smoked salmon.
You don’t want mush so go easy with the mixing!
You can add other bits and pieces to this, preserved lemon is fabulous, and celery. I have also made it with prawns rather than salmon, which was also really satisfying.
If you want something lighter, or are making this to accompany another protein you can actually leave the fish out all together
When asparagus isn’t in season, you could use french beans, broad beans (peeled please!) or sugar snap peas, something with a bit of crunch is nice I think.
I wanted to make something to give to two of our neighbours who have been particularly "neighbourly" recently, and with an abundance of strawberries about at the moment, jam seemed the perfect choice. I tried strawberry jam last summer, ending up with astonishingly sweet ice-cream sauce.........it didn't set. A common problem with strawberries, which have a low pectic count, the thing which makes jam "jammy". But never one to give up (I'm a Taurus, I have heard the word stubborn mentioned.....as if) I came across a product called Jam Sugar, which contains added pectin. It makes jam making so easy anyone (i.e me) can do it........
Strawberry and Vanilla Jam
Add a pack of the jam sugar to a kg of fruit in a large saucepan (I used my preserving pan) , the instructions on the pack said to mash the fruit up but I like whole strawberries in my jam so I didn't. I also added 1 tbsp of vanilla bean paste.
Stir over a low heat until the sugar melts, then crank the heat up and boil rapidly for about 5-7 minutes, until a drop of jam on a cold saucer will set when you run you finger through it. Take of the heat and allow to cool for a couple of minutes (this is supposed to stop all the fruit floating to the top)
Pour into sterilised jars, I do this by placing my clean jars & lids in a oven set at 120C for 10 minutes. Pop the lids on when cold, not before or the moisture can create mould under the lid.
For more detailed instructions check out the Chelsea site here
This looked so pretty, and after having a big dollop on my crumpets this morning I can confirm it tastes really great, full of big chunks of fruit, with a faint hint of vanilla..............your neighbours will love you.
P.S the cute labels are courtesy of NZ Gardener magazine!
Thursday, September 30
Easy potato curry in a hurry.......
I have been craving curry for a few days, and I wanted to make the yummy looking flatbreads over at Pod & three peas . When my vege box arrived, the huge pile of spinach was so fresh looking I knew that had to be in the curry somewhere (and lets be honest, the quicker I use it, the quicker I get a quarter of my fridge space back...). Combine with potato, and you have my version of the Indian classic sag aloo.
Nigel Slater's spinach and potato recipe, in his wonderful vegetable book Tender was the inspiration, but I fear his tastes may be slightly more austere than mine. I like my spinach well wilted with the potato, and the splash of lite coconut cream (I know, how unlike me to use lite anything, but actually it was fine) gave a lovely creaminess at the end. But if you don't have coconut cream, don't worry, you could use a spoonful of yoghurt, or indeed nothing at all, it will still taste fab.....
Potato and spinach curry
2 medium potatoes (or about 500 grams baby potatoes) peeled and cut into chunks
2 small onions peeled , halved and cut into thin crescents
1 tbsp mustard oil (if you don't have mustard oil, just use canola or olive)
1 tbsp canola oil
2 cloves garlic, chopped
1/2 red chilli, finely diced (OR a good pinch of chili flake)
1 tsp of grated fresh ginger OR large pinch ginger powder
1/2 tsp black mustard seeds
1/2 tsp fennel seeds
1/2 tsp turmeric
Salt & pepper
LARGE bunch spinach (about 400 grams) OR 2 bags of baby spinach
1/4 cup lite coconut cream (optional)
Big squeeze lemon juice
Boil or steam your chunks of potato until tender when you put a sharp knife into them. Meanwhile heat the oils in a frying pan (I use a 23cm for this) over a medium heat and fry the onions for about 10 mins until tender. Add the garlic, chilli and the spices and stir for another minute or so, to get rid of the raw taste.
Season with salt & pepper, then add the potatoes back to the pan, stirring to coat them with the oil mix. Add a cup of cold water and stir again. Place all your chopped spinach on top of the potato and put a lid, or piece of foil over the top. Turn the heat to med-low, and cook for another 10 mins or so until the spinach is wilted, and about half the liquid has evaporated. Stir in the coconut cream, check the seasoning and serve, easy.
I was dealing with an electrician when I got home from work, and realised I would not have time to make the flatbreads, so we has these parathas from the freezer instead. I get them from New World, and they are so easy, just chuck in a heated frying pan straight from frozen, they are done in about 2 minutes, genius!
You might also notice a handful of broadbeans in the curry picture, I picked them fresh, and just chucked them in about five minutes from the end of the cooking time, but 1/2 a cup of frozen peas would also be perfect.
I cant say this is terribly authentic, but it was really tasty, filling and quick to prepare, so I will definitely be making it again....
On a totally different note, I was out walking last night (yep, Plum K is still trying to get leanish....), trotting along at a decent clip and feeling pretty pleased with my efforts, when I was overtaken by a guy with a backpack........... walking home from work! Not out exercising mind, just returning home (I assumed) from a day at the office. And as he whizzed past me he turned, smiling, and reassured me I was "doing really well"........??!
How tragic does a girl exercising have to look, that a stranger feels he needs to reassure her she will actually make it home PRIOR to her coronary, while simultaneously zooming past like she is almost stationery. Keep your kind words stranger, I'm just fine thanks.....my face will return to its normal colour in no time!
Mustering as much dignity as I could in the circumstances I smiled (grimaced) and bid him a hearty good evening..........I might have tried to trip him up but I didn't want to break stride.
Really!
Tuesday, September 28
Buttermilk coleslaw dressing........buttermilk anything actually
Here, finally, is the coleslaw recipe I have been raving about. It is creamy, but not overly rich, and makes a great alternative to mayonnaise. My sister make a wonderful Asian style dressing, with fish sauce and sesame oil, but I do like an old fashioned creamy dressing, without the clagginess of too much mayo. So I got playing around and this is what I came up with. I tried it out at one of my cooking classes a few weeks ago, and it went down a treat.....
Dressing
½ cup buttermilk
¼ cup mayonnaise ( I use Best Foods, but what ever kind you have is fine)
½ tsp lemon or lime juice
¼ tsp cayenne pepper
1/4 tsp chilli powder, flakes or fresh chilli
¼ tsp Dijon mustard
½ tsp salt
¼ tsp black pepper
2 tsp chopped fresh dill
¼ tsp caraway seeds-roughly crushed in a mortar & pestle
Mix all of the dressing ingredients together and taste for seasoning. Mix through the fresh coleslaw ingredients just before serving.
Dressing will keep for about a week in a jar in the fridge, it makes about ¾ cup.
For my coleslaw last night I used
About a quarter of a very finely chopped cabbage
1 peeled carrot
4 finely chopped spring onions
Handful of chopped coriander
Handful chopped dill
seasoning
I like herbs in my coleslaw, for freshness, and I love to add fennel and radish when I have it, but it is entirely up to you
The dressing may taste almost too "milky" on it's own, but when combined with the strong tastes of cabbage and onion it works really well. This salad also transports well, so would be great for a BBQ or pot luck dinner (are they still called pot luck dinners??)
We had our coleslaw (I really want to say 'slaw, but I just cant, there being no Southern BBQ or hush puppies anywhere in the vicinity....) with grilled eggplant, and a stuffed cheesy potato....I know, a bit of a retro moment, but I was tired, and we both felt like something plain but good!
I cant wait to try the Sour Cream and Cheddar biscuits over at Smitten Kitchen this week, how good do they look? I think I will try substituting buttermilk for the sour cream since I have some in the fridge....I love biscuits, when Mr PK & I were in Amercia a few years back, I discovered biscuits & sausage gravy, to the detriment of both my waistline and cholesterol levels. Soft fluffy biscuits (like scones really) smothered in a savoury gravy made with milk & bits of sausage. It was a heart attack waiting to happen but so good, I could not stop myself. I dare not try making the gravy at home, but the chili is a grand idea, so will give that a go instead......
Friday, September 24
Sneaky vegetable muffins, a spanish mama's tortilla and a newsletter idea.....
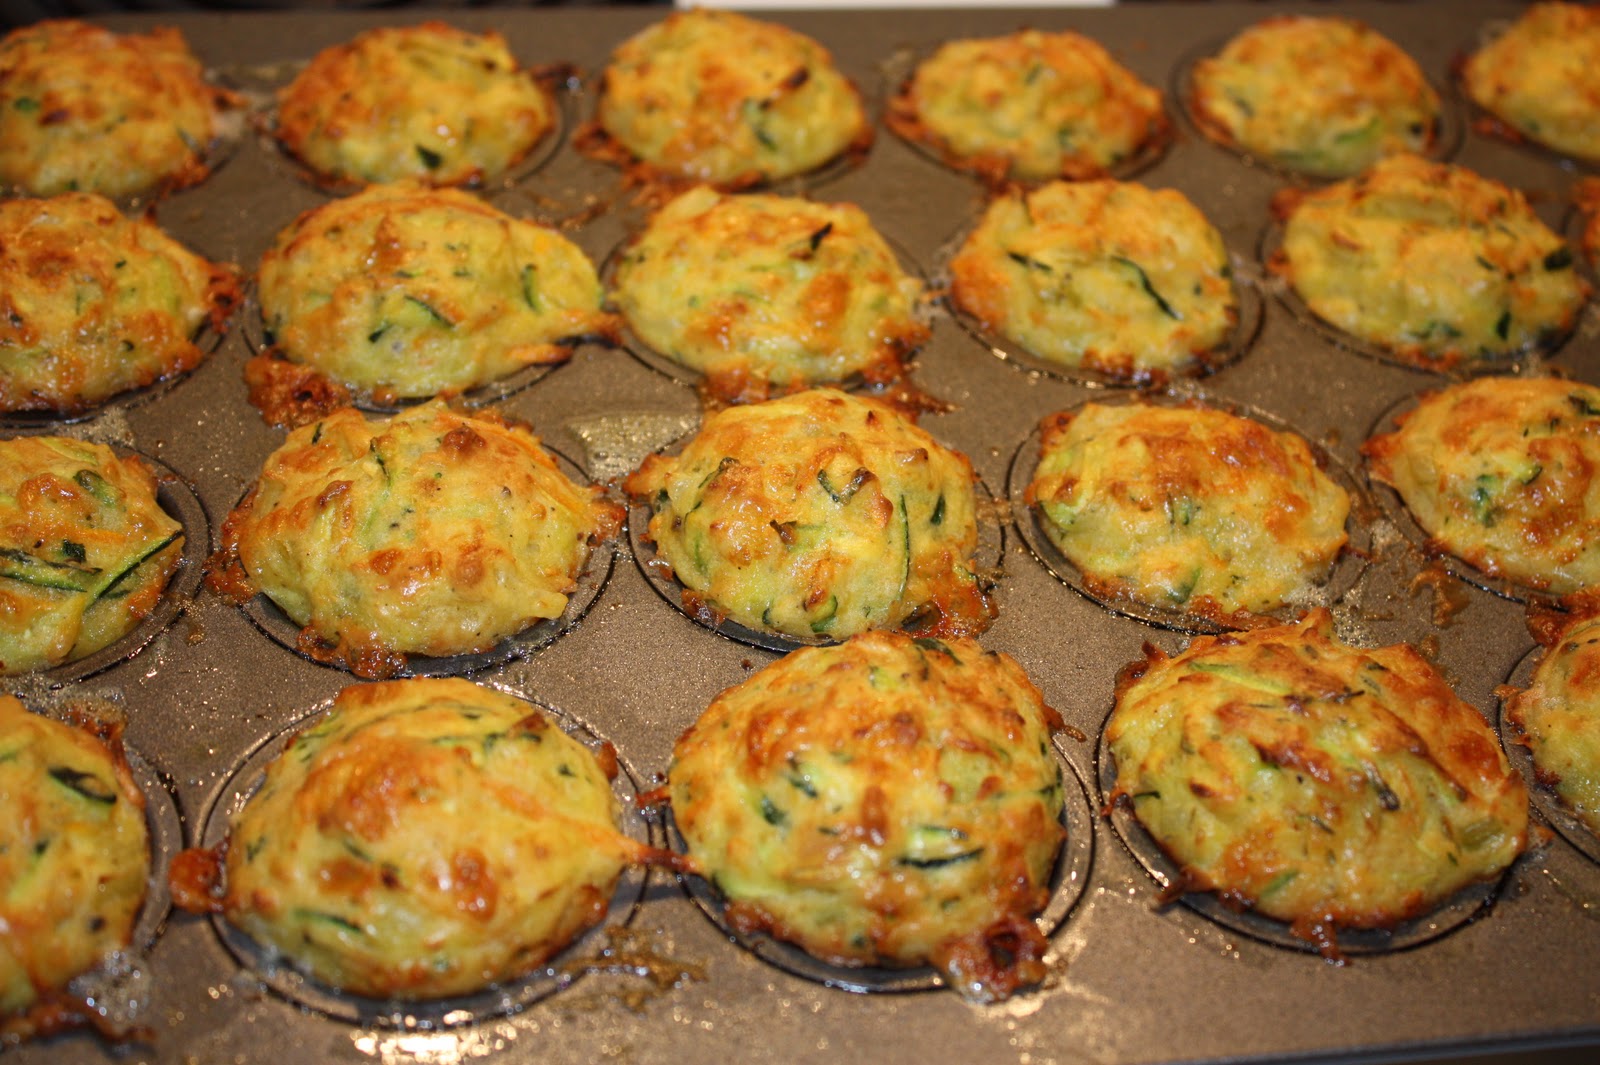
The Zucchini muffins are the absolute best, I know you should not rave about your own food (although if you dont who else will?) but I have been making them for years and I know they are foolproof. I had a lovely email this morning from one of the girls who came on Wednesday, she made these to take to her daughters Kindy shared morning tea, and they went down a treat. She commented the parents loved the hidden vegetables, which is just great. I dont have kids, but I have made them before for children who seem to like them as much as grown ups (I think the vege makes them slightly sweet?), little do those small bundles of energy know, but they are eating loads of vegetables with every bite! Ha ha, I feel so subversive.....
Zucchini Muffins
This makes about 12 normal size muffins, or 24 mini muffins, which make fantastic canapés
Approx 500 grams grated zucchini (this is 5 normal sized vegetables, not marrows!)
1 carrot grated
1 medium onion peeled and diced finely
About 2 tbsp chopped parsley
1 cup grated cheese (Tasty is fine here)
1 cup self-raising flour
¼ cup canola oil
Salt and fresh ground black pepper
4-5 eggs (depending on size)
Pre heat your oven to 180C/350F
Drain your grated zucchini, by placing them in a clean tea towel, and squeezing out as much moisture as you can, you will be surprised how much comes out of even very firm vegetables.
Put into a large bowl, and add the grated carrot, onion, cheese, flour and canola oil. Stir together, and add plenty of salt and pepper.
Add 4 eggs, and stir the mixture thoroughly, it should be moist but not to runny. Unlike normal muffins, this batter can take plenty of stirring without producing a tough result. If the mixture looks to dry, add the remaining egg.
Bake in greased muffin trays for about 20-25 mins at 180C until golden brown. Mini muffins will only take 15-20 mins.
These are so moist they don’t need buttering, but the mini version are divine split and filled with cream cheese and a sliver of smoked salmon as a canapé.
I have also served them filled with goat cheese and a tsp of beetroot relish
If you are feeding meat eaters, 3-4 rashers of chopped bacon can also be added to the mixture before baking.
Well, a few small branches on the Silver Birch aside, we survived the big storm which battered most of New Zealand last week. I felt so feeble after posting about my fair weather gardening, I actually got myself outside, dodging rain showers, and planted out a whole bunch of seedlings and lettuce plants. The neighbours must think I'm slightly deranged, standing in a force 10 gales trying not to inhale all my potting mix, while simultaneously getting minuscule seeds out of a tiny packet which refuses to open (if you want to keep something safe, put it in a foil seed sachet, they are practically impenetrable)
I felt very pleased with myself, thinking when everyone turned up at my cooking class on Wednesday night they could admire all my new herbs pots while coming up the path. Given it was dark by 7pm, and the front light bulb has blown, they were probably just lucky not to fall over one.......
The cooking class was great fun, and thanks to the lovely Mairi over at Toast and her whizz iPhone, I even have pics for you. It is usually impossible for me to take pictures and conduct the class, so it was great to get some nice ones to show you.
This makes about 12 normal size muffins, or 24 mini muffins, which make fantastic canapés
Approx 500 grams grated zucchini (this is 5 normal sized vegetables, not marrows!)
1 carrot grated
1 medium onion peeled and diced finely
About 2 tbsp chopped parsley
1 cup grated cheese (Tasty is fine here)
1 cup self-raising flour
¼ cup canola oil
Salt and fresh ground black pepper
4-5 eggs (depending on size)
Pre heat your oven to 180C/350F
Drain your grated zucchini, by placing them in a clean tea towel, and squeezing out as much moisture as you can, you will be surprised how much comes out of even very firm vegetables.
Put into a large bowl, and add the grated carrot, onion, cheese, flour and canola oil. Stir together, and add plenty of salt and pepper.
Add 4 eggs, and stir the mixture thoroughly, it should be moist but not to runny. Unlike normal muffins, this batter can take plenty of stirring without producing a tough result. If the mixture looks to dry, add the remaining egg.
Bake in greased muffin trays for about 20-25 mins at 180C until golden brown. Mini muffins will only take 15-20 mins.
These are so moist they don’t need buttering, but the mini version are divine split and filled with cream cheese and a sliver of smoked salmon as a canapé.
I have also served them filled with goat cheese and a tsp of beetroot relish
If you are feeding meat eaters, 3-4 rashers of chopped bacon can also be added to the mixture before baking.
Well, a few small branches on the Silver Birch aside, we survived the big storm which battered most of New Zealand last week. I felt so feeble after posting about my fair weather gardening, I actually got myself outside, dodging rain showers, and planted out a whole bunch of seedlings and lettuce plants. The neighbours must think I'm slightly deranged, standing in a force 10 gales trying not to inhale all my potting mix, while simultaneously getting minuscule seeds out of a tiny packet which refuses to open (if you want to keep something safe, put it in a foil seed sachet, they are practically impenetrable)
I felt very pleased with myself, thinking when everyone turned up at my cooking class on Wednesday night they could admire all my new herbs pots while coming up the path. Given it was dark by 7pm, and the front light bulb has blown, they were probably just lucky not to fall over one.......
The cooking class was great fun, and thanks to the lovely Mairi over at Toast and her whizz iPhone, I even have pics for you. It is usually impossible for me to take pictures and conduct the class, so it was great to get some nice ones to show you.
First up we made a proper Spanish Tortilla. I am using the word proper, even though we are a long way from Espana, as I see so many "tortilla" in cafes which would make any Spaniards blood boil. A tortilla is not a stodgy lump of leaden egg and potato, nor is it a dumping ground for every root vegetable known to man. It should be sweet, light, and yet substantial, and should never, ever have seen the inside of a fridge.....
This really is so much more than the sum of its parts……it was taught to me by my friend Jose’s mama Victoria, in her kitchen in Sedella in Andalusia. She is a great cook, but even if you are not using your own eggs, onions, potatoes AND olive oil as she does, this will still taste fab....the ingredient list looks sparse I know, but trust me...
Victoria's Spanish Tortilla
3-4 good size potatoes (as you probably know by now, I use Agria)
2 cups of Olive oil (I KNOW, it seems horrendous, but most of it is drained away & can be reused)
2 medium onions
4-5 eggs
Peel and slice your potatoes into small chunks. A Spanish mama would do it in her hand straight into a bowl, but feel free to use a chopping board (I do!) I cut the potato in half, then half again, and cut slim half moon shapes, as i like the way it looks when cooked and sliced, but it is really up to you
Peel your onions; slice in half then into thin crescents and chuck in bowl with your spuds. Add 1 1/2 cups of oil and mix all around to coat vegetables. Season generously, and I mean generously, potatoes need salt.
Put the whole lot into your non-stick frying pan. The size of your pan will dictate how many potatoes you use; this is enough for a 23cm pan. If the oil isn’t really coating the potato, add more, you are basically stewing the vege in the oil. But remember as the oil heats it becomes more liquid, so it will cover the potatoes more, check once they start simmering and add more then if needed.
Cook over a low heat for approx 20 mins until the potato feels tender, then drain off the oil (which can be used again no problem).I keep my oil in a jar in the pantry
Tip the spud mix into a bowl, and add 4 beaten eggs (add the remaining egg if the mixture looks too dry). Mix and add a little more seasoning, then tip the whole lot back into your frying pan, and put back on the heat. You can turn the heat to med-low, and cook for about 10-15 mins, until the bottom is golden and the egg mixture is reasonably set (so when you turn it out it isn't going to run everywhere)
Flip onto a plate, and then slide back into the pan to cook the underside for another couple of minutes.
This isn't nearly as tricky as it sounds. Take the pan off the heat, put a plate on top of the frying pan, and using a tea towel to protect your hands, grab the plate & pan together and flip. The tortilla will drop onto the plate. Now put the pan back on the heat, and slide the tortilla off the plate and back into the pan to cook for about 5 more mins. Turn out onto a serving plate
I like to serve this warm or room temperature. It travels well, so is great to take on a picnic or BBQ, I actually made this to take to the Ronan Keating concert at Villa Maria last Feb. A slice of tortilla and a glass of chardonnay was rather nice sitting in the sun! I usually just have it plain, but you could serve with a chutney or sauce to if you like, and maybe a salad, for a lovely spring/summer lunch.We also made some Zucchini muffins, and rather delish Broadbean cakes, adapted from Yotom Ottolehghi's Plenty, I think I have raved about this book already.
On a totally different tangent, I came across this neat magazine the other day, Extra Curricular for people who like craft and do it in their spare time. It is published independently by Ellie Smith and some of her crafty pals. I love the mag, it is quirky and interesting and I love the fact it is put together without the aid of a big publisher or huge budget. Check the link for stockists, I got my copy at Mag Nation on Queen Street.
On this theme, I am eagerly awaiting my copy of Martha Goes Green, a vegetarian cookbook put together by three girls in Australia (a couple are originally from this side of the ditch) ,designed and published by them independently, how gorgeous does it look? I cant wait to get my mitts on this & get cooking.....
Speaking of doing things independently, and being rather wonderful about it, check out the Underground Farmers Market, held in the flat and garden of Ms Marmitelover. This woman is fabulous, not only does she run an amazing underground restaurant in London (and is a total pioneer in the whole movement, setting up the network I belong to) but she does completely fabbo things like this, I mean, a whole market in a 2 bed flat & garden............how cool?
Cooking classes in kitchens, books from bedrooms, markets in flats, nothing like the spirit of DIY people, it's very inspiring:)
On that theme, I am setting up a little publication of my own, a Plum Kitchen Newsletter, which will be sent out monthly. It will have cooking class updates, supperclub dates, tip, recipes (of course!) , reviews and hopefully even some interviews (that's if a) I can find someone interesting who wants to talk to me, and b) I can shut my trap long enough to listen,) plus anything else I care to chuck in.....
To subscribe, please just send me an email and I will add you to my mailing list. Dont worry, I will NEVER send you crappy jokes, inspirational messages or ads for mens pharmacuticals, or give your email address to anyone else:)
Have a great weekend!
Friday, September 17
It's Spring, I don't care what the weather says....
There is a storm bearing down on Auckland as we speak. Not just any storm mind, according to weather reports this is the "largest storm in the world". Maybe it's because I come from a small country, but that kinda title impresses me. We could entirely do without it, especially those poor souls in Christchurch painfully trying to maintain normality in their broken (though not bowed) city. But as usual Mother Nature dishes it out, and in this case it's a super-size serving. So it would seem no gardening for me this weekend......again!
As you can see my little greenhouse isn't exactly filled with an abundance of seedlings. If I'm honest the ones that are there came courtesy of my sister Liz..........I know, pitiful. Linda Hallinan would be ashamed .I have a big girl crush on Linda, I even took my mum to see her garden when she opened it to the public, Mum was most impressed, although perplexed as to why I can be so interested in vege gardening, yet so ordinary at it. It is a mystery. Every time I put my garden gear on it rains, and I am a soft fair weather gardener.......I did brave a bit of rain to pick my freesias you can see at the top of the page. I love freesias, the smell in the house makes me happy, and they look so pretty in a wee jar.
I do have one edible crop I am harvesting at the moment, and that's broad beans. They send a shiver down my sister Annie's spine, but I think that is memories of farty fat beans, boiled with the gray horrible skin left on, grim indeed. Fresh beans, picked while still about fingernail size, don't need peeling, and can be cooked or eaten raw in salads, or smashed up with peas, mint and feta cheese , oh yummy!
You must excuse the container, when Mr Lawn Mowing And The Odd bit of Flower Gardening But The Veges Are Your Area and I moved in before Xmas, the garden was mainly a rockery at the front, and not much else. Containers are my solution until I can organise my raised beds, and these obsolete Auckland City Council recycling bins fit the bill nicely, even if they don't look terribly attractive....
Last nights supper was supposed to be Grilled Chicken with pesto and coleslaw. I even made my tangy creamy buttermilk dressing, then discovered the fridge had partially frozen my cabbage, not happy! Even worse, it had also dealt to my basil, leaving just a few sorry leaves unblackened......clearly plans had to change. Instead I came up with grilled buttermilk chicken, potatoes baked in duck fat (not nearly as decadent as it sounds) and a fab green salad with pine nuts and fresh broad beans. It was divine, and I feel I really achieved the almost impossible, making a skinless boneless chicken breast tender and tasty. After that there is clearly very little I cant do, and I shall be offering my services to the UN forthwith......
I still have dressing for a weekend coleslaw, so don't worry, I will share that recipe next post, it is a goodie.
Buttermilk chicken
Firstly, take your chicken breast, and pop it in a plastic bag, or between two pieces of baking paper. Bash with a rolling pin, to flatten the breast. It will then cook much more evenly. One of the reasons breast can be so tough is by the time you have cooked the inside of the thickest part, the edges are dry and chewy. I had four chicken pieces, so I flattened all four, and left the other two in their bags in the freezer. Being thinner they will also defrost much faster.
For the marinade, mix together:
1/2 cup buttermilk (despite the name, this is actually a low fat product, you could also use plain yogurt)
Grated zest of a lemon
Freshly ground black pepper
Half a chopped chili
1 tsp rosemary finely chopped
Pour this all over the chicken and leave to marinate as long as you like, even an hour will make a difference.
For dressing the chicken after cooking, I made a Basil oil. I took my sad little pile of rescued basil leaves, tore them roughly into pieces, and covered with a little EV olive oil. Let that sit for a while and the oil takes on a delicate basil flavour and fragrance.
While the chicken is marinating, I sliced a couple of Agria potatoes into rounds about 1/2 cm wide, and tossed them in a tablespoon of melted duck fat. I know this sounds decedent, but duck fat is amazing with spuds. I buy it in tins, and decant it into a glass jar, which lasts in the fridge for months and months. Use it for roasting potatoes and you will see what I mean....if you don't have any, or don't want to use animal fats of course olive or plain oil would be fine. Place the potatoes in a layer on a baking sheet and put into an oven heated to 180C for about 45 mins, until they are crispy. I like to serve them sprinkled with parsley
For the salad, I used glorious fresh greens from my vege box delivery and added in some peeled carrot strips, toasted pine nuts and fresh broad beans straight from the pod, then dressed the whole thing with olive oil and a splash of this amazing Chardonnay vinegar. I know, the price is horrific, but it is so wonderful I ekk it out, nothing could taste bad with this splashed all over it........
To cook your chicken, wipe off all the marinade and brush sparingly with oil. I know this seems a little wasteful, but a wet piece of meat will never brown up nicely, and that brown char is where you get a lot of flavour. The marinade has done it's job now anyway.
Season your meat, then either grill, or as I do, use a griddle pan, heated until nearly smoking. Grill each side until it is really well browned, which will also mean the meat will not stick. When it feels firm to the touch it is cooked, so don't keep cooking it just in case! Removed to a warm plate, and let the meat rest for a couple of minutes. Serve it splashed with your basil oil, and a squeeze of lemon juice. The acid in the buttermilk/yogurt tenderizes the meat, ensuring it remains juicy while cooking, try it for yourself, very yum.
I was very excited this week to have a mention on Ele Ludemann's great blog Home Paddock and in her discussion of Food Blogs on the Critical Mass show with Noelle McCarthy on Radio New Zealand. If you would like to have a listen here is the link, the food blog portion starts at about 3.05 minutes. I would do this regardless as I love writing about food and 'stuff', but it is rather nice to hear people appreciate what you do:)
Sunday, August 1
Potato and bread, the path to happiness...
Flicking through The Best of Annabel Langbein (what a great go-to book, packed with recipes, and they work) I came across a Potato Focaccia Dough recipe. Potato and Bread. Combined. What's not to love?
Potato and Focaccia Dough- from The Best of Annabel Langbein
1 1/2 cups warm water
1 1/2 tsp dry yeast
1 cup packed cooked mashed potato ( I didn't have any leftovers, so I boiled two Agra potatoes and mashed with butter, seasoning and a splash of cream as usual, there was enough for breakfast the next day with a poached egg, joy)
1/4 cup EV Olive Oil
4 1/2 cups strong bread flour (plus a bit extra for mixing)
2 tsp salt
More oil & sea salt for topping
Put the water in a jug with the yeast, I also added a 1/2 tsp sugar, stir, and put in a warm spot next to the heater for 10 minutes or so. Meanwhile put your mashed potato, flour, salt & olive oil into a bowl and either add the water yeast mix and stir with a wooden spoon or your fingers, or do as I do & use the dough hook attachment on your much loved Kitchen Aid. If you are doing it by hand tip the mix out onto a floured bench and knead for about 10 mins by hand (for a description of kneading see here ) It will take 5-8 minutes in the Kitchen Aid. When the dough feels smooth and silky, and bounces back when pressed you are good to go. It may be slightly sticky from the inclusion of the potato, so you may need to add a little more flour, this is quite normal. Rub the inside of the bowl you have used with a little oil, put the dough back in and leave to rest in a warm place until it has pretty much doubled in size, this will take 1-1.5 hours. Yes it takes time, but it isn't time you are actually required to do anything.
This is simply the best loaf I have ever made. I know I should not wax lyrical such about my own cooking, but quite frankly modesty would be misplaced here, it might make you believe this loaf was something less than utterly delicious and not bother making it. That would be a disaster.........
If you have never made bread before, can I urge you to do so, it is so rewarding. The house smells yeasty and wholesome, the dough feels gloriously soft and smooth, yet alive in your hands, and the lucky person you break bread with will look at you like you may, just ever so slightly, in a very non-smug NZ sort of way, actually be touched by genius.............just smile serenely and keep eating.
I am covering breadmaking at my next cooking class on Wednesday 4th August, this session is full, but if you are interested in attending another class covering bread, please let me know as I would be happy to do a repeat class if there is enough interest. The more people who can bake their own bread and pizza, the happier I will be........
Thursday, May 13
Another pizza......with potato. Yes, potato.

In a delicious "Naples by way of Dublin" twist I give you the new fave in the Plum K. household, the potato pizza.
Pizza dough is surely the easiest of all breads to make, and if you are not in a tomato frame of mind this makes a top variation. We are often not in a tommy frame in our house, due to an unfortunate incident yonks ago with a dish very accurately labeled "three kinds of tomato pasta". I was newly arrived in London, lonely and jobless while my suited and booted other half trooped off to the City to talk about football all day and head to the pub after work (I think he did something in banking in between times). We were living with an 80 year old family friend, so as you can imagine we had little to converse about after the weather....I saw the offending recipe on an morning TV show, and thought I could at least be useful and make supper.......my two compatriots were sick all day & night, i was fine so I dispute to this day it was my tomato extravaganza ......I spied this recipe in Dish last month, it is very similar to the focaccia dough I make, and the idea of potato, to a good Irish girl like me , on a pizza was intriguing.......anyway, enough raving, all you need for your dough is:
1 cup lukewarm water (remember heat kills yeast, so "blood temp" is about right), into which you place 1 teaspoon of sugar or honey, and 1.5 tsp dried yeast ( I used Tasti brand, in the baking aisle at any supermarket). Leave this for 5-10 mins in a warmish place till the little balls of yeast are replaced by a foam on the top of the water. This tells you the yeast is alive, and with the help of the sugar, is turning into the gas that will combine with the gluten in the flour and help your dough rise. It's magic! In a large bowl put two cups of High Grade flour. This has more gluten than standard, it might also be called Strong or Bread flour. Add to your flour a good tsp of salt, and a tsp or so of chopped fresh rosemary. This will smell heavenly when your dough is cooking.
Now add the yeast liquid to your flour, and using your hands mix together. You may not need all the liquid, just add about 3/4 of the cup and see how you go. I realise this lack of exactness is frustrating for newbies, but bread making is not an exact science, which is a good thing, honest. You will feel the dough coming together and when it is mostly a ball, rather than lots of separate bits of sticky flour, tip it onto the bench and start to knead. This is not tricky, just use your right hand to push the front of the ball of dough away from you, then pull it back and with your left hand twist the dough a quarter & repeat. Imagine you are stretching the dough, and as you work it, it becomes easier to stretch. After about 4-5 mins you will have a dough that feels smooth and springy under your fingers, if it still feels "tight" just give it another minute or two. Really that's all there is to it. Your dough can now be chucked back in the bowl with a tiny bit of oil rubbed on the surface, and left for about an hour or so in a warm place (I pop mine next to the heater, or next to the stove if I have the oven on) to double in size. This is called proving. I have made this in the morning while getting ready for work (honestly, it took all of 10 mins while I ate my toast) and then put it in the fridge, which slows down the proving time. When I got home I just left it on the bench for about 30 mins while I took makeup off, got changed blah blah, and it was good to go. Heat your oven to about 200 C, and place an oven tray in to heat also.To make the topping simply thinly slice some waxy potato's (I use Red Desiree, Jersey Benne would be perfect also) and put in a saucepan of water with some salt. Bring to the boil, and boil for 1 minute, then drain, and slosh through some good olive oil. I use the peppery fancy stuff here, as I want plenty of flavour. A good grind of black pepper, an srpinkle of sea salt and some more chopped rosemary or chive and you are done. Take your dough out of the bowl and on your bench which has a sprinkle of flour, knead it again for about 30 seconds. Now you can roll it out to one big pizza or several smaller ones. I use a rolling pin, but an unopened bottle of wine would also work? I like quite a thin base, but it is up to you how you like it......
Take your hot tray out of the oven and slap the pizza dough on top. No oil or anything is needed on the tray. Tip your potato onto the dough and spread out so it is one thin layer. Sprinkle over a generous amount of freshly grated Parmesan cheese. The Kapati one is nice if you don't want to spend a fortune on the Italian stuff. I also used mozzarella last night because I had been given some, but it is fine without. Put the tray back in the oven, and in about 15-20 mins you will have a fabulous supper. I like to sprinkle a little more olive oil after it comes out, and some parma ham is also lovely, as is some fresh rocket. But the plain version is just fine...trust me.
Monday, May 10
Happy birthday to me me me.....
What a busy time at PK HQ! I celebrated a thirty-something birthday last week, and I must say my haul of goodies has been pretty impressive, very spoilt. I have posted pic's of some of my gifts, as you can see I have a slightly retro bent. I had to leave my old/new to me coffee table at Mum and Dad's as it would not fit in the car, a mid-century Scandi beauty (with just a slight dent in the veneer suffered in transportation, Dette very carefully saved the bits so I can glue them back on!) will post a picture as soon as I take possession. How very grown up to have a coffee table.....
The tea cup set is particularly pretty, and I will be using that for my mid-morning beverage, I also scored a tin of homemade Anzac bikkies from my sister Liz, which I have ekked out as long as possible. Things like that always taste better when made by someone else. The orange casserole is just crying out for an old skool stew, I thought maybe Lancashire Hotpot?
I cooked up pork two ways this weekend, firstly rubbed ribs with BBQ sauce from Jamie's American book, with cornbread and tooth achingly sweet Pecan pie. USA on a plate, it was good.
Then on Sunday I roasted Pork Belly, also very delish. This method came by way of our friend Andy in London, he got it from River Cottage Everyday, and kindly emailed me instructions, very helpful! I got the meat from my butcher, who trimmed the flesh and scored the skin. This is one of the many good reasons to use a butcher, they do fiddly jobs in seconds I would take ages to finish...and probably cut myself in the process. I then rubbed the meat all over with a bit of olive oil, and some peppercorns and coriander seeds I crushed in a mortar and pestle. I then rubbed in some sea salt, and bunged the whole lot in a 220C oven for 30 mins. Turn the heat down to 180C and cook another 1.5 hours. I also poured about a cup of apple juice into then tin, so the meat stayed really moist. The skin was not crispy enough for me after the 2 hours cooking, so I simply left the dish in the oven and turned the grill on, it was crisp and bubbly in no time. It is pork skin, along with bacon, that will forever prevent me joining the ranks of vegetarians, its simply a sacrifice I cant make...........our pork and bacon is Freedom Farms, that's about as noble as I can get on this one I'm afraid........
I served this with my new BFF vege, Celeriac. One of the ugliest vege to grace your table, I will post a pic next time I buy some so you know what to look for. It is a member of the celery family, but is a root, with a texture more like kumara or turnip, and an intriguing smell, celery but not, if you know what I mean......?
Anyway, for Potato and Celeraic Bake peel and slice a celeriac, then plunge it straight into water with lemon juice squeezed into it. Unlike yours truly, celeriac goes brown at the drop of a hat. Slice about 5 large agria potatoes thinly, then placed these in alternating layers with the dried off celeriac slices, seasoning as you go. Pour two 300ml bottles (yes, two!) of cream into a saucepan and heat with a couple of bay leaves, some peppercorns and a peeled whole clove of garlic.Strain the flavoured cream over the spud mix, cover it with foil and popped into the oven with the pork when you turn the temp to 180C. I put it at the bottom of the oven so the temp would actually have been more like 160C, this kind of dish benefits from low slow cooking. The resulting creamy potato celeriac mix is comfort food par excellence, with the tender pork, crisp crackle , some applesauce and a green salad with a really tangy vinaigrette (you need something to cut the richness of everything else), well, if that does not say "I love you Mum and I am sorry what this is doing to your cholesterol, make sure you hit the All Bran tomorrow", I don't know what does?
Subscribe to:
Posts (Atom)